28.6.11

Trim


Two molds waxed and here I'm trimming the edges and starting the runner and riser stage.
I'll post a better description of runners and riser later but just for now, those things that look like breadsticks are runners and risers.

Insides


This gory seen is the first layer of wax painted on to the mold. Each layer is about 2mm thick and I put a total of 4. At this point of the process began the burns, in total I must have burnt myself about a million times...ouch.

In reverse


When looking at the mold, it's hard to imagine how the finishe piece will look. It's all back to front.

Wax melting


The wax (top picture) is chucked in a bucket and put on a gas hob to melt. To give it some colour we add a red pigment; bottom picture.

Negative


Plaster mold ready for the next stage, it was really filthy but I didn't take photo's  of that stage.

Dismantle


This is John and Aaron helping me dismantle the mold. The clay has done its job now and is finished with now, it's washed and re-used. The mold was stuck to the piece with vacum that meant it was remarkably tough to shift.

Numbering up


These are close ups of the mold where you can see the numbering of the seperate parts.

27.6.11

Monolith


Plaster mold complete and looking pretty solid, the bars on the side are for carrying the individual pieces when the mold is broken down in to its component parts.

Going Off


The mold drying out.

Top stuff


This is John and me working quick time to make the top part of the mold. That's John's hardcore work hat.

Back to the second


To make the top part of the mold I had to build some clay walls.. this is what they looked like.
At this point I have to state: this project is already finished and this blog is a description of what I've been doing for the last year. The work is finished and will be reveled here soon.

26.6.11

Looking from land to location


Standing on the shore, the landmass in the background is North Devon.

24.6.11

A break from the make


Division


John's showing me how to divide the top into four using very delicate sheets of metal. When completed my hands looked liked I'd been getting kung fu with a cat. Donald Smith is in the background looking pretty arty.

Side show


So the plaster sides are all in place, next is the top. Richard Slatter's in the background working on his super precise busts (when I get permission from him I'll show you the finished stuff). Richard is one of the UK's leading bronze sculptures, truly amazingwork.

23.6.11

Plaster mold PT1

Due to the scale of this monster everything had to be made in pieces. Here you can see the MDF shuttering at each corner, on the left hand corner you can see the first part of the eight part plaster mold which was poured with the shuttering in place which was then removed and repositioned for the next corner. The brown spot is for the positioning of the handles which come later. That's the master John busy tweaking something with the mold.

Getting technical


At this point I had to make a 'vessel' to make the plaster mold. Because each sculpture ever created through all time is unique, each process is the first time it will have ever been done. This natty little system was devised by John Nichols, the foundry master. He would take a problem home with him and come back the following day with a super cool solution. The plastic covers are to keep the moisture in.

Dusting down


So now for the next stage: Little did I know that the lost wax process involves about 8million stages. At this point I am dusting the work down with a talc like substance to get ready for the first mold.

And now for the sides


I haven't got any image of the sides being made, it involved flattening out some clay with a rolling pin and then offering it up to the sides of the box that the top surface was sitting on. Once each side was in place I trimmed the top to come in line with the waves. You can see Marco in the background mixing some grog.

Almost done with the clay


After a couple of weeks of working in clay and multiple changes, the surface of the piece was pretty much complete. This thing is a meter by a meter so the first issue was becoming very clear... weight.. The foundry at Chelsea is just about as good as a foundry can get, however the size of the furnace limits the amount of bronze that can be boiled at any one time. Stayed tuned to see how we overcame this situation.

A few days later


Heres a few frames from a timelapse movie that I am making of the whole process. I'm working with clay here, building up the sculpture on top of the sweet box that Stef Willis made for me. Clay takes a lot of looking after so I spent a lot of time spraying this joint.

18.6.11

Day One..


The starting point


This is the first drawing used to provide the guys in the workshop with an explanation of what I wanted to try achieve in the foundry.. The idea was about five years old at this point but this was the first outing it got in the public.

6.6.11

Severn Sea Story


I set up the blog to record the process of the production of the sculpture I have been working on. It's a long old story so I'm going to cut it up in pieces. The initial idea for the piece first to hold about six years ago. A small piece of the Bristol Channel 51º23'53.02"N 3º34'13.92"W.

2.6.11

A Micro Second


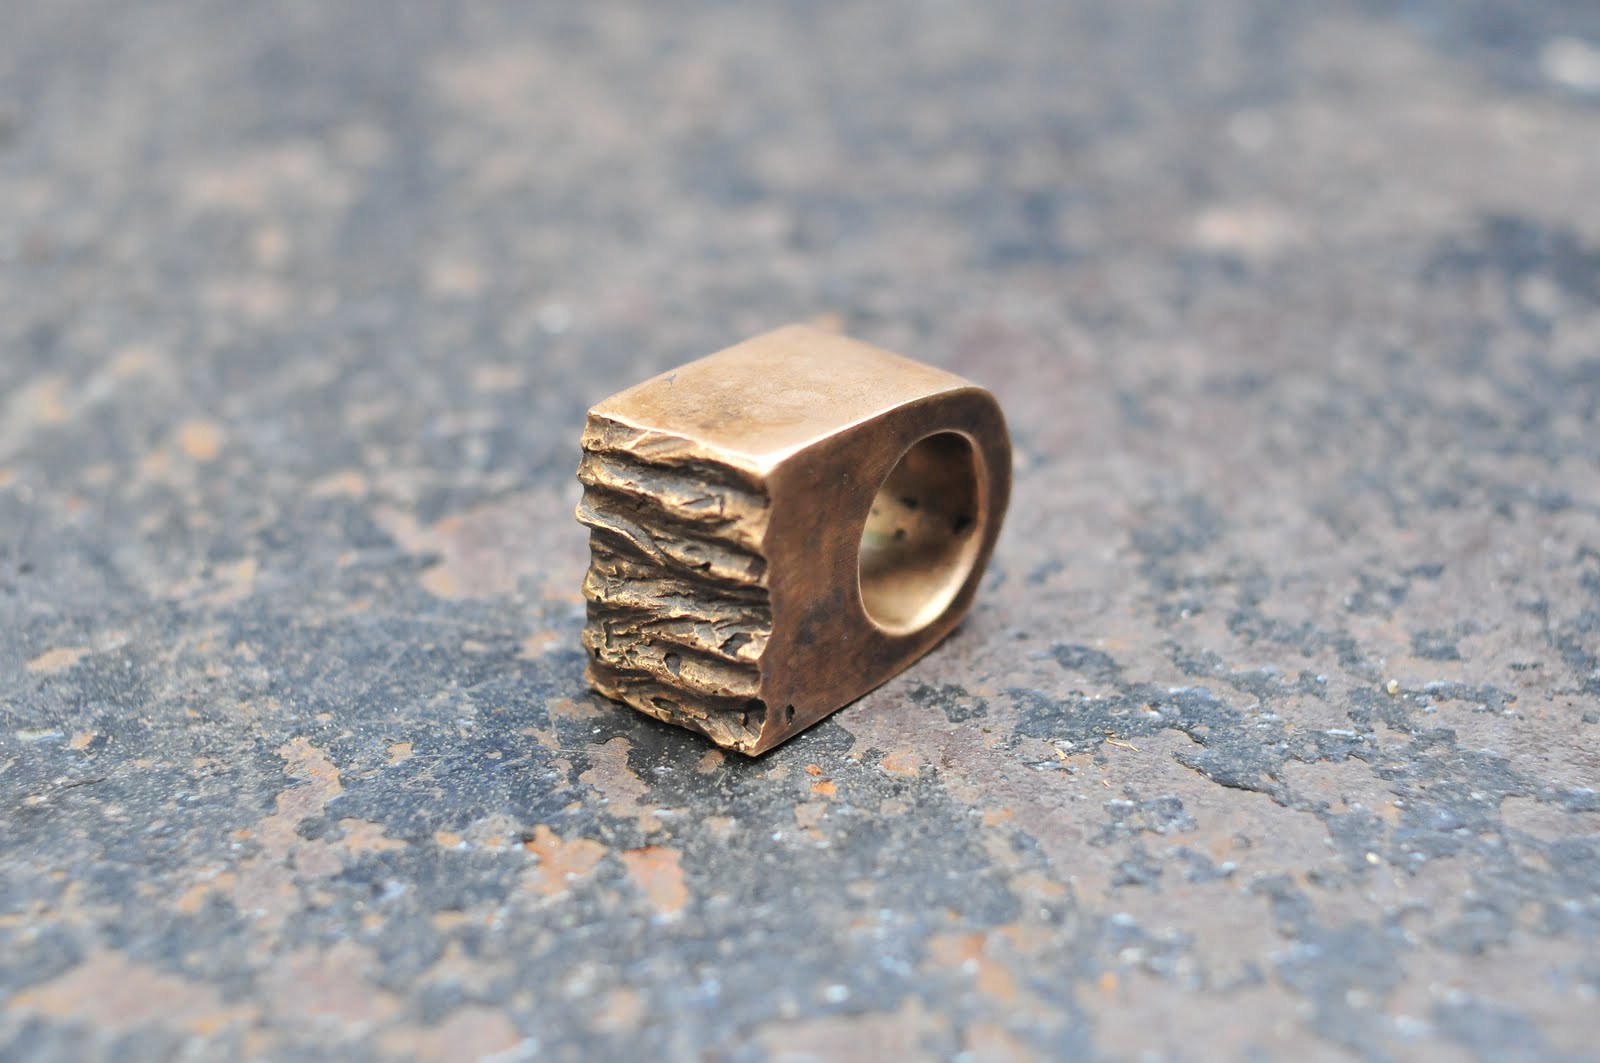
This crazy ring is the result of a technique called Guerilla Casting. During my time in the foundry, my mate Marco and I inveted this process of casting as a way of dealing the left over 'Grog'.. grog is the plaster mix you use to make bronze casting molds and gets produced, literally, by the bucket load. Usual rule of thumb is to produce a little more then you need. Nightmares happen when you don't have enough. So what Marco and I (under the watchful eye of the Master; John) decided, in a fast running out moment of time, that we would use other peoples left over grog plaster to make molds of our own.. the only problem was: what do we cast? so in a matter of seconds, the foundry was scoured for castable object.. we've made some real beuties, this ring was a wax piece that I had knocking about in a box, a left over from some much bigger sculpting.. And bingo baby.. I got me some major bling..
Everyone wants one now, so I'm going to be doing a run..

1.6.11

Llantwit Major Limited Edition


Hand printed t-shirts.
The story behind these tee's go's back a long way.. too long for here but the potted version go a little like this: "Llantwit Major? well it's just like California" never a truer word said.